That’s a reference to waiting tables. However, any joke that has to be explained is not a good joke. I know. Moving on… I get a lot of questions about painting furniture. So, when I actually remember to take pictures of the process, I like to post on it.
The console table got a makeover recently, and I’m here to show you how it was done. I will forewarn you now. There are a LOT of pictures. Perhaps unnecessary pictures. And it’s a LONG post. But you did ask for it, right?
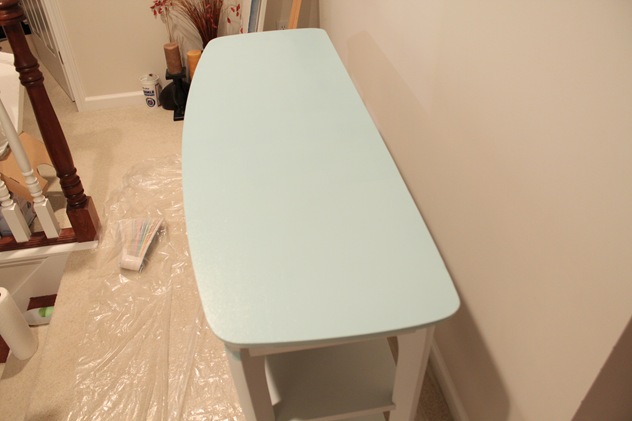
Rule #1: Paint with reckless abandon right in the middle of your hallway. Slap some dollar store plastic on the white carpet by the white walls, and paint the most obnoxious turquoise you can find. Live. on. the. edge.
I will clarify right now that I did NOT prime this table, nor did I sand it down. The “white” looking paint underneath is just another color that I had already painted on there before. If I planned on using this table or I thought it would get more wear and tear, I would have prepped more. Since it’s just on display upstairs, I didn’t worry about that.
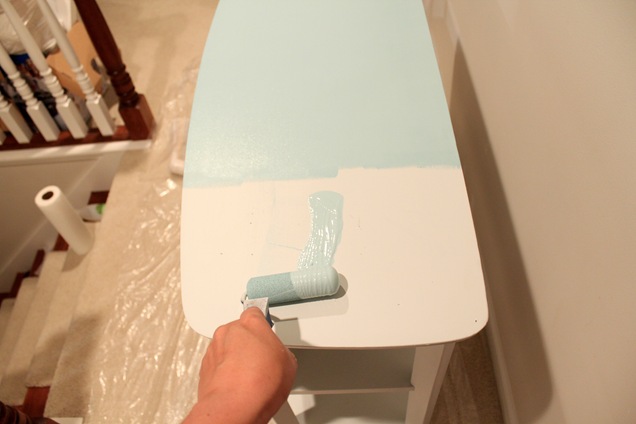
I paint one of two ways. I either use my beloved spray gun, or I paint with a foam roller. I chose the roller on this one because I wasn’t quite sure of the color, and I didn’t have any help to carry it down two flights of stairs to the basement.
I’ve had some comments that people use the roller and get streak marks or lines. I have to be honest here…I’ve painted numerous pieces, and I’ve never had that problem. My thoughts are that maybe you’re not using a quality paint, or maybe you’re pushing too hard when applying the paint. It’s not an exact science or anything, but do try to apply the paint with less and less pressure as you apply it. Seriously—not one streak mark.
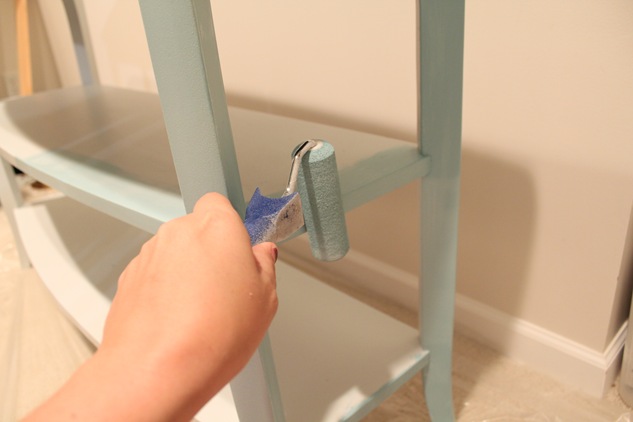
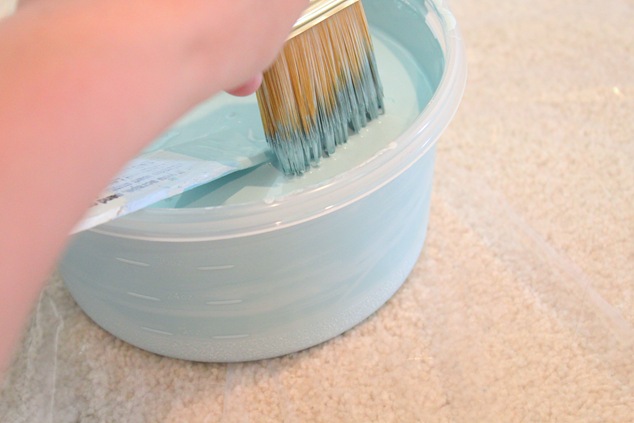
I’m gonna just keep breaking the rules here. I don’t use a paint tray. Gasp! I literally dip my foam roller right into the can. How much paint I need determines just how much I dip it. Mad skills. I’ve got ‘em.
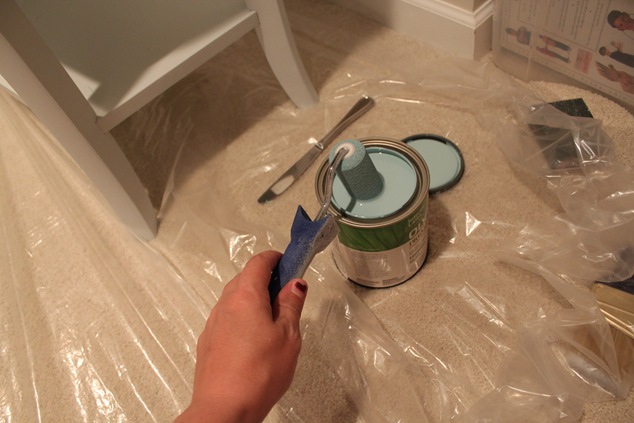
I got lucky on this table because it was all straight edges. I didn’t really have any fancy edges to worry about or any crevices that needed extra attention.
I basically just kept rolling and rolling. Kinda like Dory and her swimming.
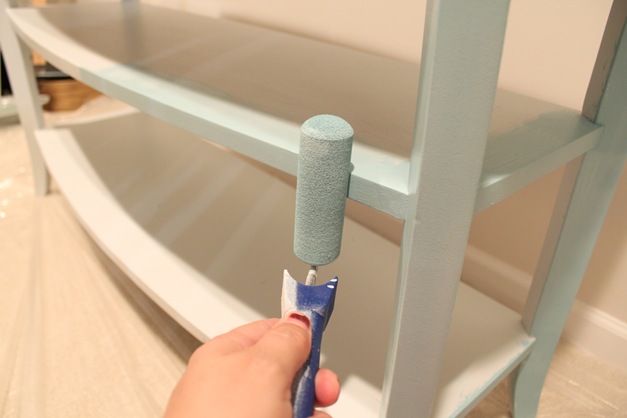
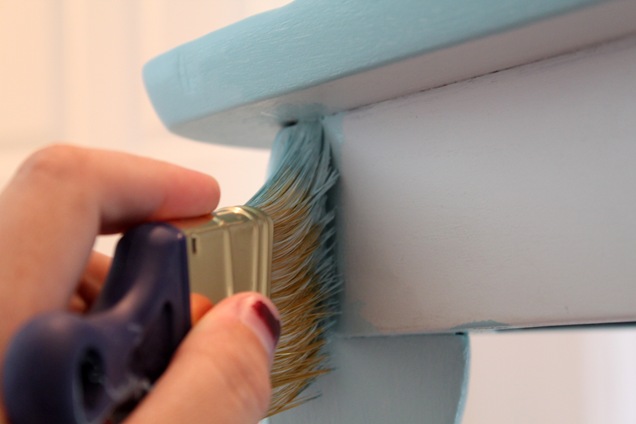
Even the flattest of tables will have spots that you need to get into. The roller won’t reach everything, so you’ll need a nice brush to do that for you. I found this little ma-bob at Lowes (I think), and I l-o-v-e it! It has a rubber handle, so it’s very forgiving on your hand when you’re dabbing and brushing. Just love it.
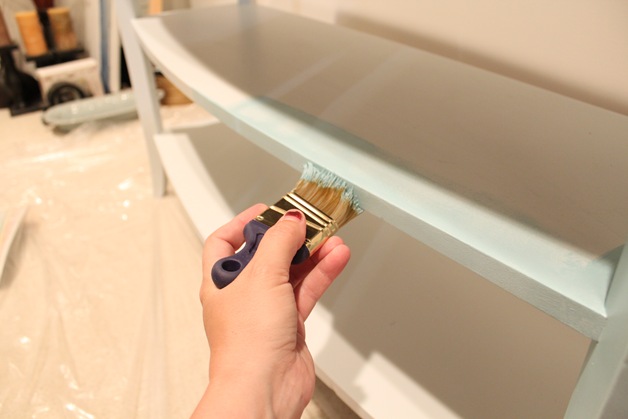
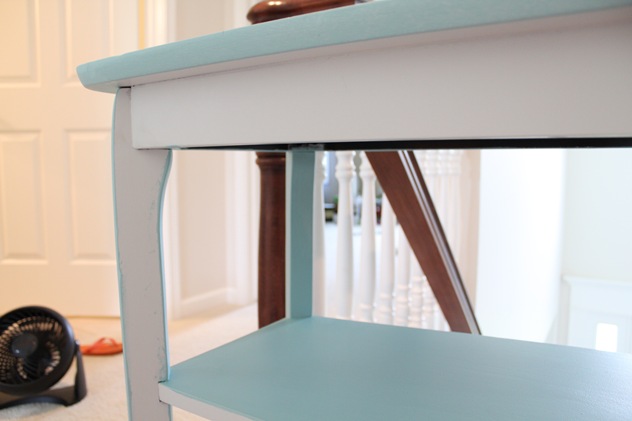
You might be able to see that there are still some residual black parts left to it. Uh yeah…that was two coats of paint ago. Poor little table. I needed to make sure I got into all those little corners this time because of the angle people would be looking at it as they came up the stairs.
The key to using a brush to get into crevices and joints is to use a little amount of paint. You get too much, and it globs up. Then you’re spending all your time catching all the excess that drips. You’re also ruining your perfectly good roller job because you’re constantly brushing off the extra. Very lightly dip your brush into the paint.
Why are you looking at my nails? They’re not the point of this post.
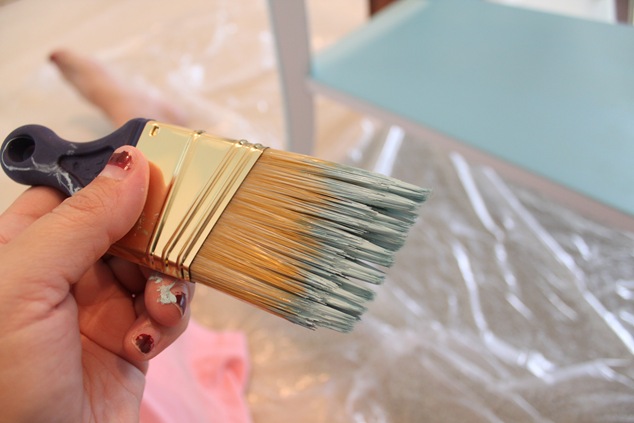
Here’s one without my manicure distracting you. Notice just barely any paint on the tip.
I then used the brush to get into all the joints, and I immediately smoothed any brush marks out with the roller. You just kind of have to play around with the two tools. Have a damp paper towel to place them in when not in use, and they’ll be fine while you paint.
That’s it, really. Roll, dab, brush, smooth out, and repeat. The worst thing you can do is totally mess it up. Big deal. 🙂
Alright. Now onto the details of the paint. (Will this post never end?) I’m going to declare this to the world right. now. I am HORRIBLE at picking out paint colors! Horrible! I don’t know that I have EVER picked out a paint color, and it totally worked for me. Well, maybe twice, but that doesn’t sound as dramatic.
Here’s how much thought went into this table. I was at Lowes with my kids one day, saw a paint swatch that I thought was pretty, and I bought a quart of it. Thinking I might paint that table. Now, you know how I love my BM {giggle}, but this was convenient. I thought picking it out on a whim might break my color curse. Nope. Still got the wrong color.
I was NOT going to spend another dime on another wrong color, so I just mixed it with what I had. Enter: BM {giggle}.
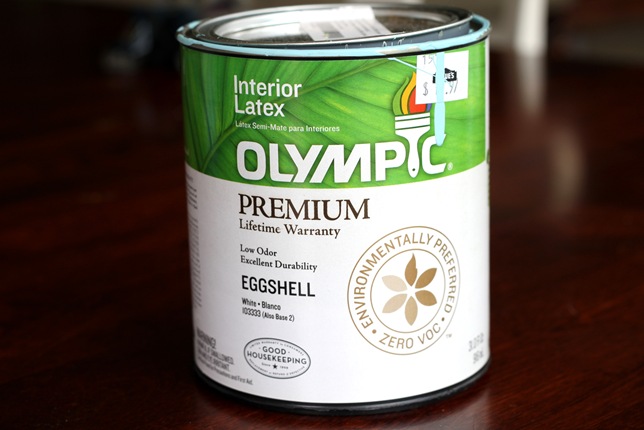
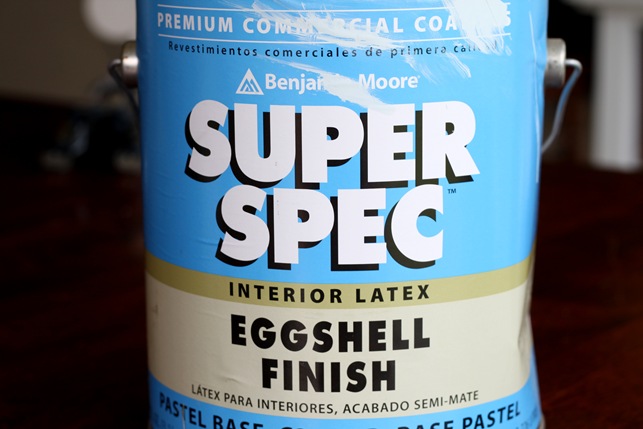
The Olympic color is Alpine Valley, and I mixed it with Benjamin Moore’s Ocean Air. Here’s where you’re going to hate me. I can’t tell you the exact color. I just kept toning down the brightness of the turquoise until I thought I had a good balance. The first few pictures of this post are actually of the original color. I let it sit overnight just to be sure that it wasn’t for me. It wasn’t for me.
Alpine Valley Ocean Air
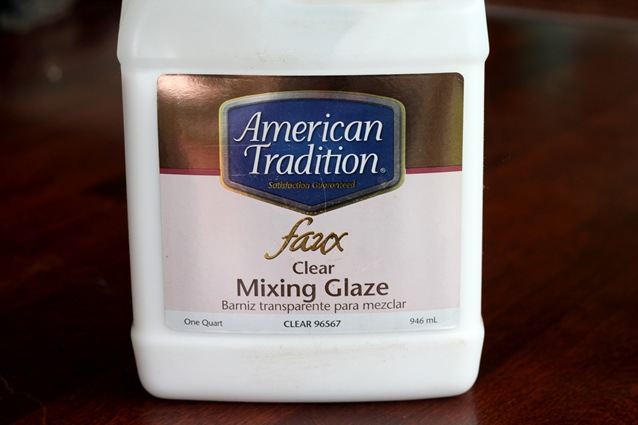
This is where I got all fancy. I found this glaze that I purchased at my grocery store back in 1964. This stuff holds forever! I’ve never glazed before. It scares the bajeebies out of me. I mixed a little more of the Ocean Air with my mixed paint into a smaller bowl to lighten it JUST a tad, and I added the glaze. Mix, mix, mix/apply with old washcloth/close my eyes because I’m afraid to look.
Once it was all dry, I rolled on a coat of Minwax (water-based) just to keep her from getting all scratched up. The big bowl on the bottom is my paint, and the little bowl on the top is my glaze mixture. You really don’t need much.
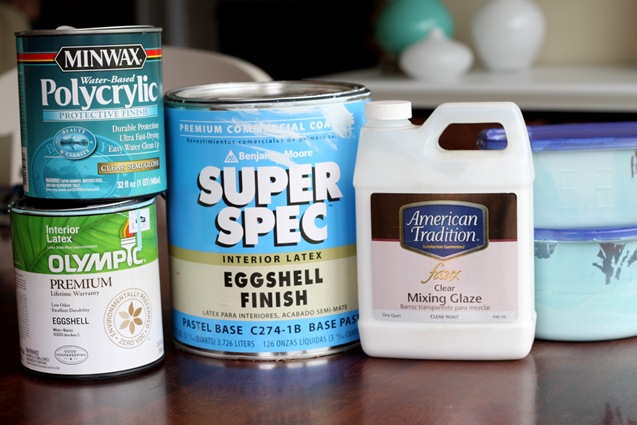
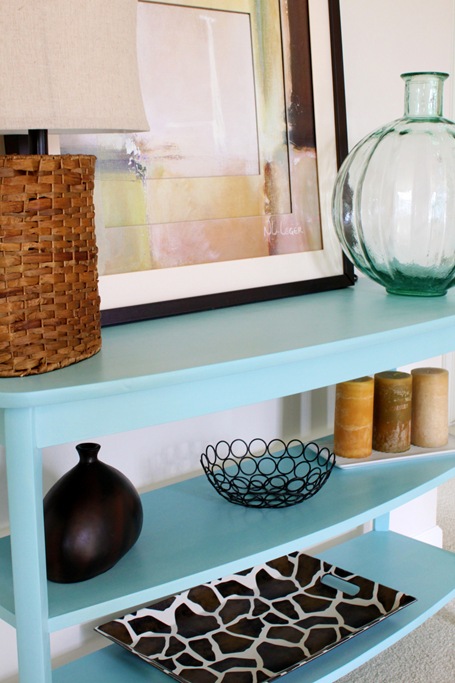
I don’t know how, but somehow it turned out beautifully. The glaze adds just a tiny bit of depth (that really doesn’t pick up in the pictures) that I was looking for, and the color is spot on (now).
I tried to match it up on my Benjamin Moore sampler, and this is the closest color I found. The only issue is that the glaze changes thing up a bit. However, this is pretty darn close. It’s called Blue Seafoam.
And finally. Yes, I did remove the nail polish.
The. End.
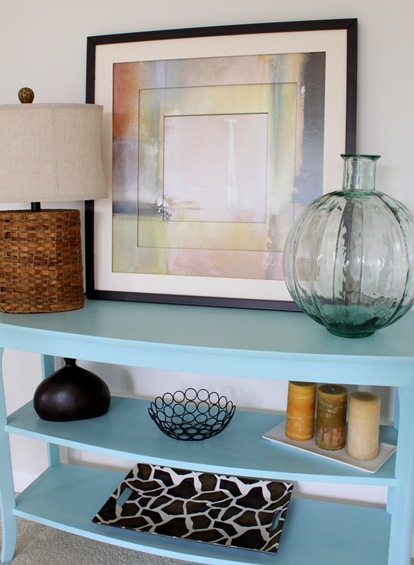






It looks amazing! I dont think its obnoxious at all. So much fun!
so you’re a lefty? lol and i love those blue rubber handled brushes from lowes too… i buy them all the time (because i’m too lazy to wash them sometimes). again…love that table. :o)
Well, I wasn’t going to say anything, but it’s my third one. 🙂 And yes. I’m a lefty. Explains a lot, doesn’t it?
Hiya! I had to laugh reading about your color picking issues – me too! I will see a can of oops paint and invariably think: THIS is the coolest color and I’ll use it on EVERYthing in my needs-paint line-up! I’ll take the gallon! And then I’ll bring it home and paint a test piece and see that what my mind happily imagined as driftwood-seaside-gullsegg is actually more like industrial-prison-gray. And then I mix it with one of my free Glidden quarts that I also mis-chose and paint everything medium meh blue for months. I’m so glad to read that someone else comes home with not quite the right color instead of magically picking exactly the perfect shade each time!!! xoxoxxo
I know, Eliza! Who are these people, and how do we become one of them? Too funny. I feel your pain…
I love it! I have an end table that needs to be painted but picking the color has completely stalled me. Maybe I’ll just go to the paint store, close my eyes and pick!
I love your table and the color. I’m also horrible at picking paint colors! Before I paint a room, I have to buy at least 5 samples (minimum). This really irritates Hubby!
love the color! i am horrible with paint colors too. it is so hard to see a little swatch and know what it is really going to look like. love the little blue handled paint brushes too…they really are great! thanks for sharing this great info!!!
-emily
nestnestingnested.blogspot
Playing around with paint colors and glaze is my latest obsession – nothing wrong with customizing your piece, right? Love the color it ended up and love the tip of dipping the foam roller.
The table looks great and I love that you made a custom color. I do the same thing with dipping the brush right into the can. The less things to clean in the end the better.
I think I spy the Wooster 2-inch sash brush! I LOVE that little guy. So much so I even have it on my favorite things list. They aren’t at my Lowe’s around here; I’ve only been able to pick them up at HD. The extra mile trip is worth it though. Great color on the table!
Chris…you had me until you got to the glazing part. I’m scared of glaze b/c I don’t know what to do with it. I got nervous just reading about it. Of course I’m a chicken who has never painted any furniture!!!!
Don’t you worry, Susan. It would still be beautiful without the glaze. I was just living on the edge that day. 🙂
what a beautiful shade of turquoise! I have the worst time picking paint colors, I recently painted a side table for my daughters room a bright-ish turquoise, decided it was too bright so I applied some stain to darken it, I like it but now I have decided I think I liked the original color better so am debated repainting it. I am so indecisive it’s not even funny *sigh*
What a fun project you did. 🙂 Stumbled on your blog earlier and couldn’t tear myself away! I am now a “follower” in hopes that all of your posts are so charming, photo filled, instruction filled….I’m HOOKED!
~Suzanne in Illinois
Oh no! The pressure! 🙂 Welcome, Suzanne! I’m so glad you found me and decided to stay. Thank you!
You are FUNNY. And I don’t care one bit if a joke has to be explained. Not if the explaining is done by someone who writes as well as you.
I do have a question about your painting technique. Do you use a new foam roller for every paint job, or do you clean and re-use roller covers? I’m guessing that I probably do apply too much pressure when I use a foam roller, but I want to learn to be streak-less.
Great question, Richella! I’m lazy, so I just use a different roller for each paint job. I buy them in a pack of 6 or so for @ $6-$8. I make sure to keep a bunch of ’em around at all times. Money well spent. I hope you become streakless soon! Wait…I don’t think that came out right. 🙂
Were you being sarcastic when you said you bought the glaze in 1964? The table is beautiful!
Yes. I wasn’t born until 1973. 🙂 Thank you!
LOVE this table! I’m a huge fan of a pop of color. And that lamp is super yummy 🙂
I love painting with the small foam rollers as well. And yes, they are a pain to clean … so wrap it up and use for tomorrow or throw it away! Right there with you. Not so sure about the dipping in the paint can!! Too funny! The only time I do that is when I am painting with a brush. I just painted a metal chair desk chair a color close to that table. Love it!
You are hilarious! I always laugh reading you posts that depict how to do something. I love the table color and how you so scientifically mixed it.
Hahaha! You had me laughing through the whole post! I love that you don’t take your painting to seriously and just do the best you can with it. By the way, that color is gorgeous! I’ve never actually mixed paint, but I think I just might have to give it a try now.
I absolutely love this table of yours. I am hosting my first Link-up party – Tea Time Thursdays. Would be glad see you there 🙂 Can you link up your table to the party?
http://tanyaanurag.blogspot.com/2011/08/celebrating-one-party-time.html
I love that I noticed that manicure of yours 2 pictures up before you said anything. That’s the kind of critical and judgmental friend I am to you. (oh sheesh!)
The table looks so nice! My kids bathroom is actually painted similar to that Alpine Valley – good for kids, not tops of stairs. I think you toned it down perfectly. ps…I’m scared of glazes too!! They always look so complicated!
This blog had me laughing through my morning coffee – and boy did I need to laugh this weekend!!! Thanks so much for the tips – love the glaze idea. I will definitely be doing that in the future. It looks FAB!
The best thing about your comment, Lauren, is that you laughed! I love that I could do that for you. Thanks for your kind words!
Love this! Love especially that you used a brush and foam roller. I have that same little paint brush and I think it’s the best thing ever!!
Hi, I stumbled over your fab blog in my search for tips about painting a nest of tables. I’m ridiculously scared of painting furniture but in my quest to adopt a ‘no fear’ approach to crafting in general – if I can stop laughing long enough to actually do anything – I will have a go. I have never once in my life picked the right colour paint either which probably explains my reluctance to paint anything…
I know you can do it “Quirky”! We’re all beginners at one point, ya know! Dive right in. Good luck and thank you for stopping by!
Hi Chris! Thanks so much for your painting tutorials and especially the close up shots. Like Quirky, I’d never painted before but after seeing all the beautiful furniture redos decided to give it a try. So far I’ve done two footstools and messed both of them up! Yes, footstools! There’s hardly anything to them, but I managed to ruin them. Am using them anyway because there’s no way I’m going to strip them, but I’m so bummed out. How in the world am I’m going to graduate to beds and dressers? I think it’s mostly technique and am so afraid it’s one of those things you either have or you don’t! So far, I don’t. Should I just get a bunch of plywood boards and practice on those? I know…please be patient with me. Thanks!
Hey Regina I actually think that is a great idea. I’m having issues also. I KNOW I can do it, I KNOW I can! Because I do small painting jobs all of the time…and I am GREAT with craft (acrylics craft paints..those lil bottles)…so I dunno what my problem is with painting this dresser with regular paint! Though this paint is A LOT thicker! The reason I think it would be a good idea to try out the techniques on plywood it because it’s long. I am proof that just bc you can do it on a small object doesn’t mean you can do it on a larger one. But maybe with the plywood boards you’d get better practice. Thinking I may have to do the same!! Well, once I get my dresser completed, I’m going to start posting on my brand new blog…come check it out in the future (no blogs yet but there will be soon!)
Oh and here’s how you get to my blog…..http://propheticwings.blogspot.com/
I freakin love you! You are artistic, funny, and fly by the seat of your pants. Its great:)
I also like your color choice. I just bought 2 tables at a yard sale for $15 and Im gettng ready to play 🙂
Thanks for the post!
I just LOVE you!!!! You made me laugh out loud! I KNEW you were going to say something about your nails! Haha! I love the way you do things…a LOT like me!!
I’ve been having problems with refinishing a dresser/changing table…which is my first, real, big refinishing project! I’ve been practicing on small items like piture frames and candle sticks. I’ve done GREAT on those!! I even feel like I’ve already mastered the glazing technique! It turned out to be pretty easy huh!? It’s my kinda technique girl and sounds like it would be your kind too!!….I mean c’mon, you slap it on then wipe it off, leaving some behind! Haha! It’s great!My problem though is that my paint job is not smooth at all! Im using a purdy paint brush but I just cant get it smooth looking. I think it would be fine for a distressed piece but, well, it’s still to bumpy! So after reading your post Im thinking I need to just use the foam rollers! But what about “cutting in?” Isn’t there a difference in the way the paint looks near the creaveses, creases, corners and such, and the rolled on part? You know what I mean? Like one being thicker than the other? Or having streaks where you had to cut in with the brush? AND… what do you do about projects that have details, carvings and embellishments??
Thank you SO much for taking the time to read my comment and considering answering! I’m sure you are a busy girl!!
Just found your blog, love all the projects! I’m looking into getting a paint sprayer for projects like this but know nothing about them….what kind do you have and would you recommend it? Thanks!