Anyone remember this? No, I’m not talking about the bedroom. I’m pointing out the erroneous purchase of 84” panels instead of 90”. Now you’re remembering, right?
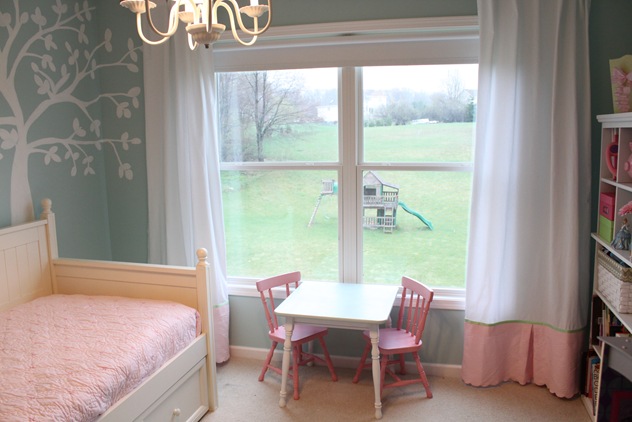
Well, I finally got around to fixing the problem—for free. With the purchase of the new daybed, I no longer had use for my daughter’s bedskirt. It was a Pottery Barn purchase, and the skirt was a heavyweight quilted panel.
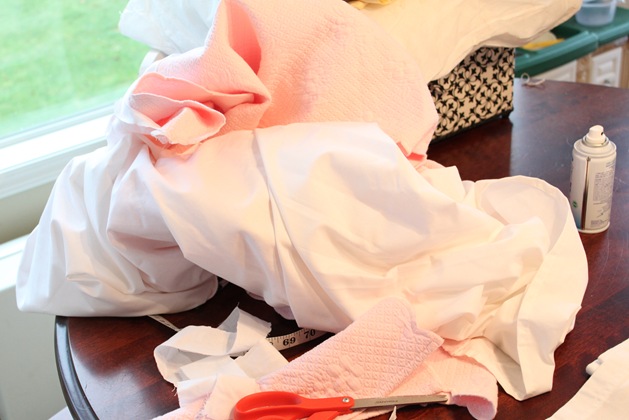
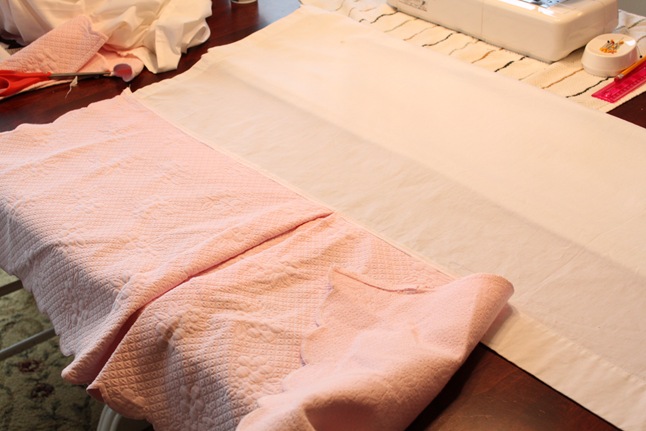
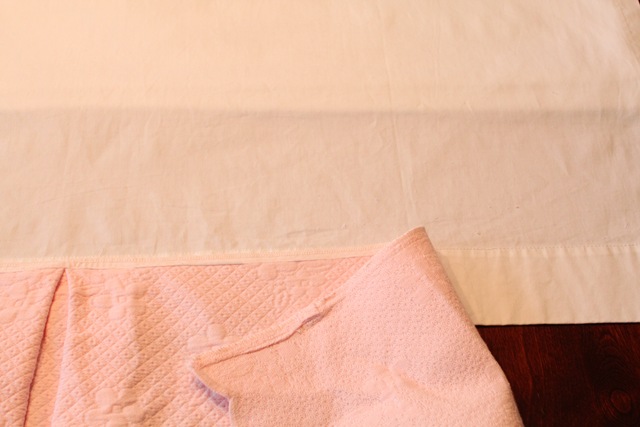
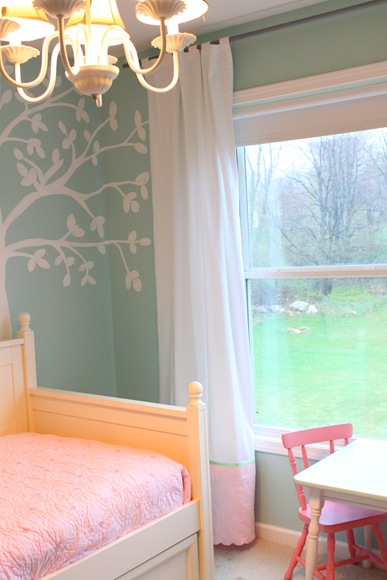
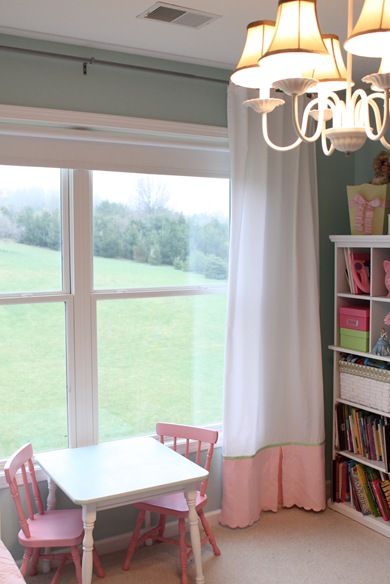
With scissors in hand, I chopped the skirt part right off the panel. Because it had a cute pleat in the middle of it, I had to line it up right with my shorty short curtain.
I didn’t even worry about the shredded material that was still attached. I knew I’d be covering it anyway.
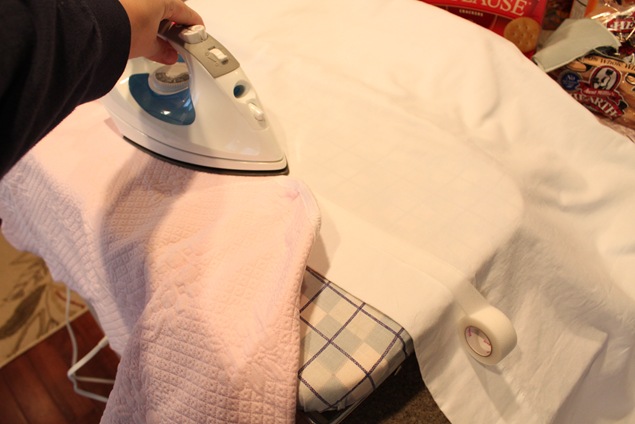
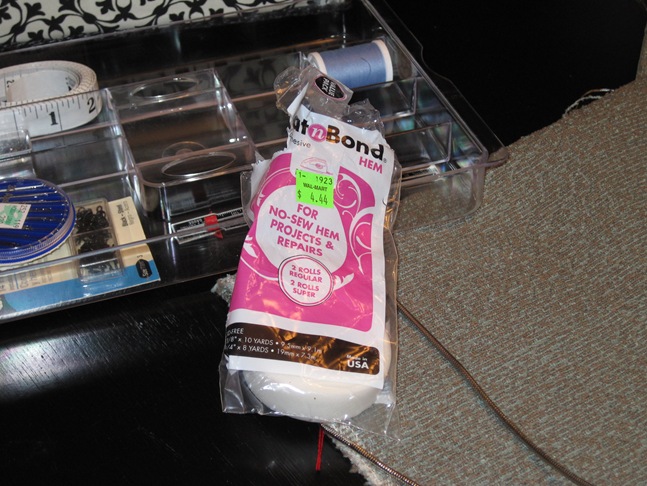
I know I could have sewn this, but I didn’t want the worry of puckering or crazy stitches (both of which would have happened). Instead, I used this HeatnBond hem adhesive. It’s so easy to do, and it HOLDS!
I simply lined the bottom of the curtain with the adhesive hem, ironed it down, and it was done. I forgot to take a picture of it, but I used some ribbon I already had, ironed it down as well, and it hid the frayed edges! Ta-da!!
So… (or should I say no-sew) for free, I was able to fix what used to be a “design” faux pas and make it worthy of the window treatment gods.
It’s just another example of how much money “shopping the house” can save you. Now if I could just find a maid somewhere in this house…
![IMG_8726_thumb[4] IMG_8726_thumb[4]](http://lh4.ggpht.com/_HzpqGt5NyaY/S8KKX7zy1yI/AAAAAAAAGOU/zGP4WiK4KKE/IMG_8726_thumb%5B4%5D_thumb%5B6%5D.jpg?imgmax=800)


They look fabulous. Great job!
Love it! If we ever sell this house before the girls go to college..ugh.. I want to paint the girls room a similar color to your daughters. I simply adore it. 🙂
Wanna borrow my maid? I keep her in the basement.
😉
Tudors was great by the way.
Amazing job!!
Very cute! A really nice touch & very creative!
There you go girl! I love this kind of diy quick fix kinda thing. The curtains look adorable!!!
Gorgeous!
they turned out SEW cute! Love the colors in that room too!
Great job – the room looks amazing! Still looking for that maid, and that personal chef, and throw in the personal trainer too.
They look even better now than if you had bought the 90" ones !
I love it. Your blog never fails to inspire.
So cute! Good thinking to reuse a bed skirt.
-Desiree
Those look amazing! Great job.
Let me know when you find the maid, so I can look in the same spot. Ha. Ha. Love how the curtains turned out. They look great!
Curtains look great; now you have a custom look for $0 dollars, that's what I call wonderful!!!
I love it. And I totally need to do this for my dining room curtains. The rod is low, low, low which has been driving me bonkers.
love what you did..the pink ties in the whole room and by the way…. the room is adorable! Love the view out the window too….you are sew talented….:)
What a fabulous idea! The curtains look great!
Oh, bravo! A JAG original and fabulous to boot.
Looks like this was a happy accident – they look great!
Awesome solution! I did this in my DR and LR and really like it MORE with the wide border! Your daughter's room is gawgeous! Great work…
How clever. These look just perfect.
Girl…just go ahead and move to Tennessee to help me out…you know ya wanna!!! Seriously!
Looks amazing!!
The curtains are beautiful! I love the scalloped hem. And the lime green ribbon trim. So cute!! Great job. Love & blessings from NC!
Awesome save!
ingenious! and adore the green-pink color combo..
Chris,
That is freaking GENIUS! Seriously.
love the pleat.that looks so good!
Very cute…and I am still in love with that tree mural!
LOOOOOOOVE IT! that is exactly what those panels needed. Love the room and mural WOW! JGG
Love it! And being a quilter…love the soft pink quilted fabric that you were able to repurpose!! Pink and green is one of my favorite combos. I have done my sewing room in those colors!!
So cute. You think of everything.
What a cute room and a great job you did. Hope you find that maid!!
ADORABLE! I love them!
What a pretty room! Those curtains turned out so lovely.
That looks great! I am in the process of finding some material to elongate our living room curtains too:)
Can you tell me the name of the paint color that you used in your daughter's room? I love it!
Absolute custom looking curtains for $0…priceless! that room is dreamy. Can I come live with you and have you redo a room for me??? You've got some serious skillz lady!
~Amanda
🙂
SOOOOOOOO cute!
absolutely brilliant!
smarty skirt!
OMG Chis. You couldn't have planned that any better. It turned out absolutely gorgeous.
Hugs…Tracy 🙂
Wow, it looks really nice! I've been reading your blog for a while and finally de-lurking. You have some beautiful things here. Thanks for sharing!
That looks gorgeous!
Those are incredible and I can't tell you HOW MUCH I LOVE IT. And it coordinates with her quilt….ahhh….LOVE IT!
Beautiful! They look great and I think I might copy your idea! I'm very lazy and even though I can sew, I'd rather do it your super easy way!
-Bekah
Very cute one and its good that you fixed it.
Domain registration india
I think the window treatment gods are pleased! You did a great job and using the heat and bond saves a lot of time for something like this. It turned out great, Chris!
I love it…great job!
A fantastic, creative solution that solves a problem and really improves the curtains. Now going with the design maxim that a picture shows you what is and isn't right with a room, I would like to humbly suggest that you need to take the drapes down again, iron the entire drape (including the quilted portion) using steam mist. Rehang each panel immediately after ironing, hand pleat the panel and tie it with soft cloth in several spots on the full length of the panel and let it train in place for at least 1 week. Repeat this step with the 2nd panel. The weight of the quilted portion might make it challenging to train. A pin or magnet may be required for a short period of time to remind the pleat to stay in place.
The room is beautiful and you have done a great job. Your daughter is very lucky to have such a creative mom
What a great fix-so much more fun than a plain white panel too.
I just found out about the magic hem tape and am in love with it. Great idea about using the bedskirt! I love the different textures and the cute little green ribbon. Nice touch.
Super cute! Love the pleat.
Beautiful!
I love the look! It all turned out for the best. Everything happens for a reason. The pleat in the middle is a perfect accent.
Karla
Awesome!! That's my kind of a project!
Looks great!!! You are so ingenious!!!! Now you can spend the money you saved somewhere else! lol
You just have to love "mistreatments" – especially those that don't cost anything! Great job on the curtains, they're perfect!
Looks great! I need to get this tape stuff because I can't sew a lick:(
Wow that is the finishing touch! They look fabulous! I especially love the pleat! Fantastic!
Wow! Those look great. What a good idea.
Wow Chris I love it!!! You just solved my shower curtain problem… I have a bed skirt that i love but its the wrong color for the bedroom now but it goes perfet with the bathroom and I wanting to extend my shower urtain to the floor… Thank you Thank you
Have a wonderful week
julie
The end result is so pretty I am seriously thinking of buying panels that are too short and adding a block of fabric to the bottom – love how it turned out. Also the ribbon is such a nice detail. Great job!
Very cute idea, and those look great! I can't wait to start on some projects of my own, and Lord knows I have a list a mile long!!
WOW!! Thank you so much for that, I've been waiting to see what your fix would be…it's gorgeous! Great job mama! 🙂
They look amazing! I love the way they go with the bed, and the fact that they have the pleat in them – love it!
Wow, this turned out great! I just love how you did this. It turned out so pretty….especially with the pink.What beautiful posts lately. You have done such great projects lately…I love coming by and seeing what you are upto! YOu are a busy gal!!!
Blessings,
Debbie
I think it's gorgeous. I did this in my office. I had terrific brown pique curtains, but they were too short. I added a brown toile panel with a fun fringe and they are now my favorite thing in the house.
Sooooooo cute! I bet they hang nicely too…with the added weight and all. Thanks for sharing the updated look.
They turned out gorgeous!! They actually make the curtains look like they cost a fortune! I also love that you used Heat n Bond. I hate to sew. I never thought of doing that for curtains. I am working on a craft room and need a valance. I think I'll do something like that for them! Thanks! -Karen
Oooo I love it! It looks just like you planned it!
Those are great! Love them!
They turned out great! Good job!
That looks so pretty! Love the texture of the matelesse. Great job!!
Blessings,
Stacey
Very cute, I love it! The room is fabulous.
So cute! I love how they came out. They look perfect in the room now. I am now inspired to go out and get the screws I need to hang up some curtains in my bathroom. The curtains came with the house and have just been sitting in a closet until I realized I could use them in the bathroom.
They look so cute. I love the pop of green from the ribbon.
I love it! I may have to use this when I convert my 2 years room to a big boy room!
Looks good!
Those panels just went from too short to too cute! They look like custom panels and are fantastic!
OMG…Perfect!!! love the green ribbon too. Looks like custom made curtains. How cute. What a wonderful fix for the faux paw. Now, call your mother! I've been trying to get hold of you.
Mom
OMG…Perfect…I love that bed skirt idea. The textures are great. Love the green ribbon. Those colors looks great together. Call me!!! Mom
I am so inspired. I'm going to rip through my house tonight and go 'shopping'. Seriously, what you did is awe-to-the-some.
I LOVE the shape of the bottom now, so cute and girly!
Gorgeous!
That worked beautifully. Now I bet you are glad that you accidentally purchased the shorter ones. The best creativity often comes about with those little accidents.
That room is a dream! makes me want to be a little girl again. Wonderful job!
You're brilliant! I love it.
Kaye
That is such a great idea and it looks so adorable. Bravo!
I would so love it if you posted the original pattern for that tree. I seem to remember you saying that you traced it onto the wall from an overhead, and I could so pull that same trick! 😉
Looks great! That little touch totally makes the room!
The curtains are so cute and I love the green ribbon you added! Thanks for the tutorial…I have to be the worst seamstress ever.
Holy friggin crap! That turned out GREAT!! Love it,love you.
Love your blog!!
Please tell me what color paint you used for the walls? I'm going to paint my master bedroom and want that color!!
Chris, I love that. Such a great way to fix those short drapes & it looks so adorable too.
Chris!! This is brilliant! The curtains look even better than they would have looked if they'd been the right length to start with. It's so nice when a design challenge leads you to a better solution than you would have had if you hadn't had the challenge in the first place.
Good luck finding the maid. Maids are so good at hiding. . . they must learn that in maid school.
Wonderful idea! Where did you get the wall stencil/sticker?
They look much more finished! Love them now. I love everything about the room actually, the room color is wonderful…what is it??
Well done, it turned out lovely! Wishing you happiness, Katherine
How pretty! And what a great idea!
I feel like Wayne & Garth….
not worthy!!! 😉
You're awesome!!
i love that idea. they look perfect. your daugther's room is adorable. when my little one moves to her "big girl" bed, i am stalking that tree. hope you don't mind 😉
That is absolutely AWESOME. What a difference that pink addition made to the curtain. It was simply genius adding the green ribbon too. I love your blog.
Your "no sew fix" to these curtains in the icing on the cake when it comes to your daughter's room. It really ties everything together. What a fabulous idea!
I love how they turned out! I think they look better than they would have in the first place. 🙂
they look awesome! love the ribbon detail!
So Darling!!! Way to be resourceful and think outside the box!:-)
Wow – fabulous! You make it look so simple and easy. Your daughter's room is lovely!